By default the SAML response of the WSO2 Identity Server will contain the tenant domain in the response. See the below response block which containts the tenant domain appended to the NAMEID element.
<saml2:NameIDFormat
="urn:oasis:names:tc:SAML:1.1:nameid-format:emailAddress">admin@carbon.super
</saml2:NameID>
Now the tenant domain would not be displayed in your SAML response.
Method 2 - Setting this value for the file based Service Provider configurations
Given that you have configured the service provider through a configuration file following the documentation [1], below are the steps which you would need to follow to get rid of the domain being appended to the Nameid in the SAML response.
1. Open up you service provider configuration file and then navigate to the configuration marked as <LocalAndOutBoundAuthenticationConfig> . Just above the closing tag of it add the below xml configuration. This will set the subject claim to be the given name instead of the domain qualified name.
<subjectClaimUri>http://wso2.org/claims/givenname</subjectClaimUri>
2. Next we need to add the below configuration which is highlighted under the claim configuration section of the same file.
<saml2:NameIDFormat
="urn:oasis:names:tc:SAML:1.1:nameid-format:emailAddress">admin@carbon.super
</saml2:NameID>
If you want to get rid of the tenant domain being appended you can follow one of the below methods to accomplish this
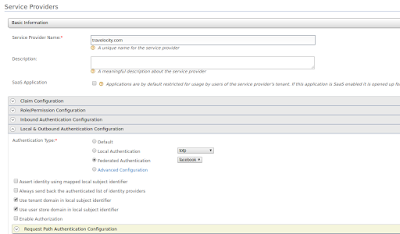
Method 1 - Disabling this option from the management console.
Log into the management console of the Identity Server
Expand your service provider configuration and select the 'Local & Outbound Authentication Configuration' option
Untick the option 'Use tenant domain in local subject identifier'
Log into the management console of the Identity Server
Expand your service provider configuration and select the 'Local & Outbound Authentication Configuration' option
Untick the option 'Use tenant domain in local subject identifier'
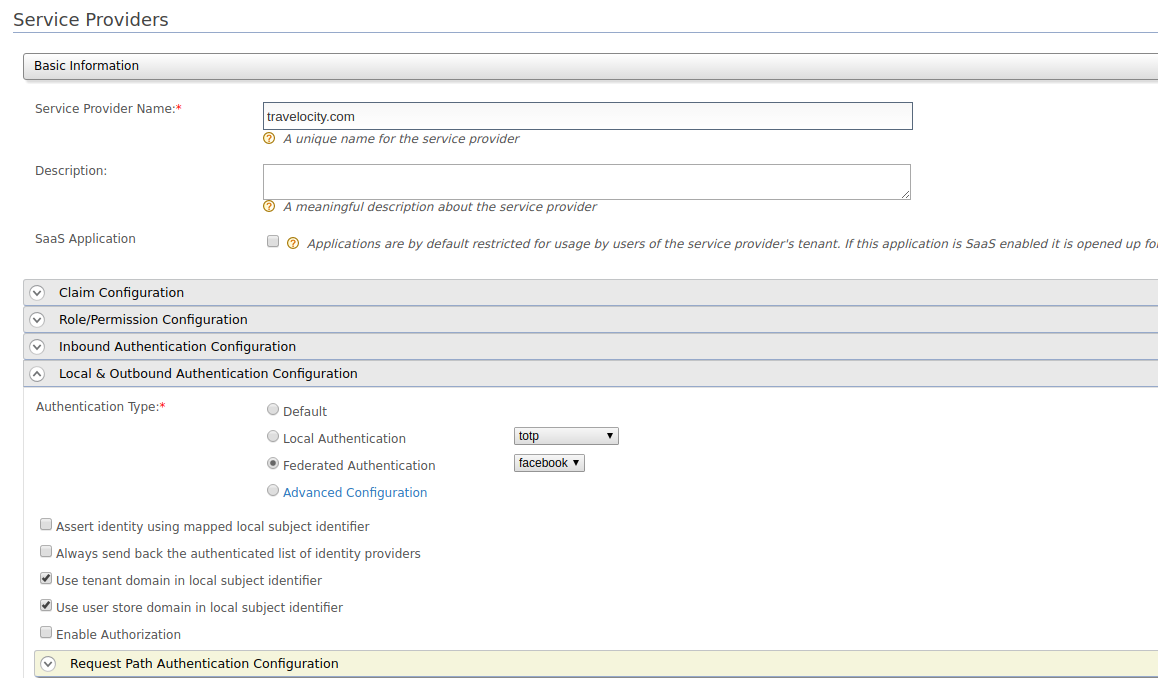
Now the tenant domain would not be displayed in your SAML response.
Method 2 - Setting this value for the file based Service Provider configurations
Given that you have configured the service provider through a configuration file following the documentation [1], below are the steps which you would need to follow to get rid of the domain being appended to the Nameid in the SAML response.
1. Open up you service provider configuration file and then navigate to the configuration marked as <LocalAndOutBoundAuthenticationConfig> . Just above the closing tag of it add the below xml configuration. This will set the subject claim to be the given name instead of the domain qualified name.
<subjectClaimUri>http://wso2.org/claims/givenname</subjectClaimUri>
2. Next we need to add the below configuration which is highlighted under the claim configuration section of the same file.
<RequestPathAuthenticatorConfigs></RequestPathAuthenticatorConfigs>
<InboundProvisioningConfig></InboundProvisioningConfig>
<OutboundProvisioningConfig></OutboundProvisioningConfig>
<!-- ADD NEW CONFIG MENTIONED BELOW -->
<ClaimConfig>
<LocalClaimDialect>true</LocalClaimDialect>
</ClaimConfig>
<PermissionAndRoleConfig></PermissionAndRoleConfig>
</ServiceProvider>
After adding this restart the identity server. You would be able to see the NameID without the @carbon.super post-fix.
References :
[1] https://docs.wso2.com/display/IS500/Adding+a+Service+Provider+and+Identity+Provider+Using+Configuration+Files
After adding this restart the identity server. You would be able to see the NameID without the @carbon.super post-fix.
References :
[1] https://docs.wso2.com/display/IS500/Adding+a+Service+Provider+and+Identity+Provider+Using+Configuration+Files
Comments
Post a Comment