Self Registration is an important feature when in comes to commercial applications. This feature allows the users the priviledge of being a part of your community without you having to go through the hassle of adding them. Mentioning ihis Identity Server also allows the capability to restrict or revise the approvals before granting access but we will be discussing that in a seperate post.
This post will guide you on how you can enable the Self Registration feature using the self registration REST APIs at a global level for the WSO2 Identity Server 5.3.0.
You can try the Rest service through Identity Server login page (https://localhost:9443/dashboard)
There are two ways in which you can enable the feature.
1. Enable it at a global level across the whole platform.
2. Enable it per tenant basis.
Let's discuss how to enable it a global level across the whole platform..
Pre requisite
Enabling the Self Registration Feature at a global level with Recaptcha.
1. Navigate to <WSO2_IS_HOME>/repository/conf/identity/identity.xml file and comment out the below config block.
This post will guide you on how you can enable the Self Registration feature using the self registration REST APIs at a global level for the WSO2 Identity Server 5.3.0.
You can try the Rest service through Identity Server login page (https://localhost:9443/dashboard)
There are two ways in which you can enable the feature.
1. Enable it at a global level across the whole platform.
2. Enable it per tenant basis.
Let's discuss how to enable it a global level across the whole platform..
Pre requisite
- Extracted WSO2 Identity Server 5.3.0. Let's name this as <WSO2_IS_HOME>
Enabling the Self Registration Feature at a global level with Recaptcha.
1. Navigate to <WSO2_IS_HOME>/repository/conf/identity/identity.xml file and comment out the below config block.
NOTE : PLEASE NOTE IF WE NEED TO ENABLE THIS AT A GLOBAL LEVEL IT NEEDS TO BE DONE BEFORE WE START UP THE IDENTITY SERVER INSTANCE.

2. Next we need to make sure some listeners are enabled in order for it to work when the operations are invoked.
In the same identity.xml file make sure the below configs are enabled/disabled. These are usually set by default in the product unless you have made any changes.
Hint: Search for the word 'email' in the file and you should be able to find the below block. Provide the email provider information and save it.

Now all the configurations needed for the self registration feature are done. Now we need to enable recaptcha.
4. Setup recaptcha as described in this documentation.
5. Now you can start up the identity server.
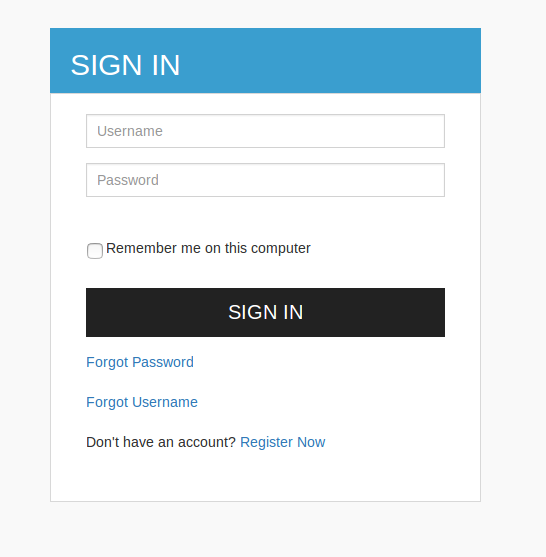
6. Once you start up navigate to the url https://localhost:9443/dashboard.
(This is for the default offset 0, if you have changed the offset please modify the port accordingly in the url).
In this dashboard which is shown above you will be able to see a link as Register Now. Click on that link and you will be directed to a screen as shown below.
You can provide the details and self register and enjoy this capability.

I hope this helped to understand how to enable the feature at a global level. In my next post I will be talking about how to customize the self signup registration page using claims.
References:
[1] https://docs.wso2.com/display/IS530/Configuring+reCaptcha+for+Self+Registration
[2] https://docs.wso2.com/display/IS530/Setting+Up+ReCaptcha
[3] https://docs.wso2.com/display/IS530/Self+Sign+Up+Using+REST+APIs
[4] https://docs.wso2.com/display/IS530/Self+Sign+Up+and+Account+Confirmation
<SelfRegistration>
<Enable>true</Enable>
<LockOnCreation>true</LockOnCreation>
<Notification>
<InternallyManage>true</InternallyManage>
</Notification>
<ReCaptcha>true</ReCaptcha>
</SelfRegistration>
Let's see what these configs mean.
2. Next we need to make sure some listeners are enabled in order for it to work when the operations are invoked.
In the same identity.xml file make sure the below configs are enabled/disabled. These are usually set by default in the product unless you have made any changes.
- <EventListener ype="org.wso2.carbon.user.core.listener.UserOperationEventListener"name="org.wso2.carbon.identity.mgt.IdentityMgtEventListener" orderId="50" enable="false"/>
- <EventListener type="org.wso2.carbon.user.core.listener.UserOperationEventListener" name="org.wso2.carbon.identity.governance.listener.IdentityStoreEventListener" orderId="97" enable="true">
- <EventListener type="org.wso2.carbon.user.core.listener.UserOperationEventListener" name="org.wso2.carbon.identity.scim.common.listener.SCIMUserOperationListener orderId="90" enable="true"/>
Hint: Search for the word 'email' in the file and you should be able to find the below block. Provide the email provider information and save it.

Now all the configurations needed for the self registration feature are done. Now we need to enable recaptcha.
4. Setup recaptcha as described in this documentation.
5. Now you can start up the identity server.
6. Once you start up navigate to the url https://localhost:9443/dashboard.
(This is for the default offset 0, if you have changed the offset please modify the port accordingly in the url).
In this dashboard which is shown above you will be able to see a link as Register Now. Click on that link and you will be directed to a screen as shown below.
You can provide the details and self register and enjoy this capability.

I hope this helped to understand how to enable the feature at a global level. In my next post I will be talking about how to customize the self signup registration page using claims.
References:
[1] https://docs.wso2.com/display/IS530/Configuring+reCaptcha+for+Self+Registration
[2] https://docs.wso2.com/display/IS530/Setting+Up+ReCaptcha
[3] https://docs.wso2.com/display/IS530/Self+Sign+Up+Using+REST+APIs
[4] https://docs.wso2.com/display/IS530/Self+Sign+Up+and+Account+Confirmation
Comments
Post a Comment